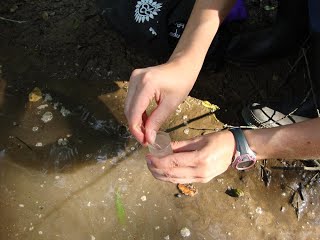
1. Water sample.
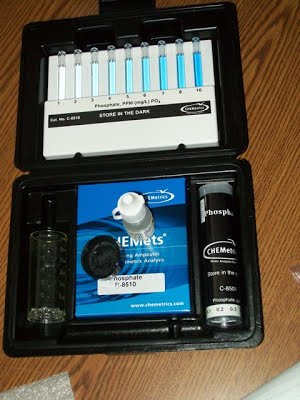
2. CHEMets phosphate testing kit: sample cup with lid, A-8500 activator solution, ampoule, comparison tubes, and comparator tube for low concentrations.
3. Goggles.
Method
1. Make sure you test the water sample as soon as possible, ideally less than 24 hours since sampling. If you cannot run the test immediately, store your sample in the refrigerator in a sealed container. When you are ready to run the test, fill the sample cup (in the black CHEMets case) to the 25 ml mark with the sample water.
2. Add two drops of the A-8500 activator solution. Place the cap firmly on the sample cup and shake it briefly to mix the contents. It is not necessary to shake it hard, in fact this may affect your results. Try to mix the contents as gently as possible – you may try rolling or inverting the container a few times.
3. BE SURE YOU ARE WEARING YOUR GOGGLES! Place the CHEMets glass tube (ampoule) in the sample cup with the pointed end down. Hold the ampoule diagonally in the cup, and push to snap the tip of the ampoule against the side of the cup.
4. The ampoule will fill with the ample water. Invert the ampoule several times to mix the chemical with the sample water. Wipe any liquid from the outside of the ampoule, and wait at least two minutes for the color to develop.
5. Hold the ampoule next the the 1 to 10 ppm comparison tubes that came in the lid of the CHEMets box. Determine which color is closest to the color in your ampoule. If it seems to be in between two colors, you may estimate the value.
a. If the blue color in your ampoule is lighter than 1 ppm, you will need to find the comparator tube located in the right-hand section of the box. Place the ampoule into the center section of the comparator tube, making sure the flat end is down, sharp end is up. Hold the comparator tube up to the sunlight or an overhead light, and determine the color as compared to the 0 to 1 ppm scale.
6. Record your results on your field sheet using a pencil.
7. Dispose of the chemicals and broken glass properly. Because many soaps and detergents contain phosphorus, you should avoid washing the sampling equipment with soap. You can clean it by rinsing twice with distilled water, and letting it air-dry.
Evaluation
Record a Phosphorus rating on your field sheet according to the chart below:
|
Rating |
1 – Poor |
2 – Fair |
3 – Good |
4 – Best |
|
|
|
Description |
Phosphorus levels
higher than 1.0 ppm. |
Phosphorus levels
between 0.1 and 1.0
ppm. |
Phosphorus
levels detectable at the
0.1 ppm level or
lower. |
Zero. No detectable
phosphorus. |
|
|
Comments |
|
|
|
|
|
|
|
Interpreting your results
The Kansas Department of Health and Environment (KDHE) has determined that levels of phosphorus greater than 0.1 ppm can have a negative effect on aquatic life. Most large detections of phosphorus occur right after an addition of phosphorus from some source (for example, just after heavy rain or just after a wastewater treatment plant has discharged treated water). If you find a concentration of phosphorus larger than 0.1 ppm, you should note on your field sheet that there was most likely a recent addition of phosphorus. Perhaps from your observation notes, you can even figure out where it is coming from! If you are testing a river at flood stage, there could be phosphorus from many different sources combining to make the concentration larger. If you see agricultural fields all around, you may guess that the phosphorus is coming from fertilizers and manures. Use your observations to guess the most likely source(s) of phosphorus for your testing site. Once the source is isolated, people can begin figuring out how to reduce the amount of phosphorus going into the water.